


Last Updated : 22 Mar, 2021
Gradle is likely one of the most essential parts of Android apps. It handles all of the backend duties and manages all of the exterior dependencies, which we will likely be going to make use of in constructing our Android Application. Sometimes attributable to any subject or after formatting of your computer. Some of the Gradle recordsdata might get deleted unexpectedly. So when you’ll begin constructing your apps, you’re going to get to see an error in Android studio as ‘Error operating android: Gradle mission sync failed. In this text, we are going to check out 3 completely different strategies for fixing this subject.
- Method 1: Restarting your project utilizing Invalidate Caches and Restart choice
- Method 2: Sync your project with Gradle recordsdata
- Method 3: Deleting and putting in new Gradle recordsdata
Method 1: Restarting your project utilizing Invalidate Caches and Restart option
In this technique, we will likely be restarting our project utilizing Invalidate Caches and Restart choice. For utilizing this selection navigate to the File choice after which click on on Invalidate Caches and Restart choice you’re going to get to see this selection within the under screenshot.
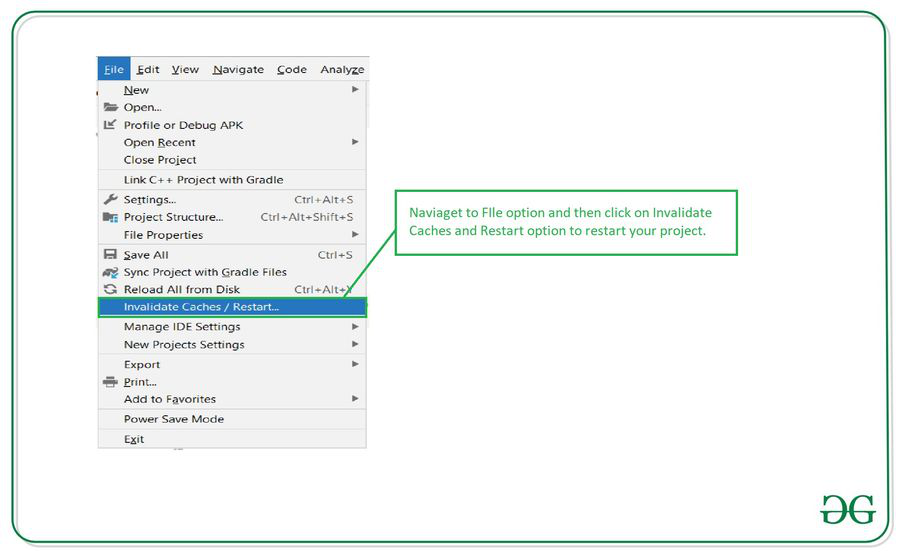
After clicking on this selection you’re going to get to see the under screenshot. In this click on on Invalidate Caches and Restart choice to Restart your Android Studio mission.

After restarting your Android Studio the Gradle subject will likely be mounted.
Method 2: Sync your project with Gradle files
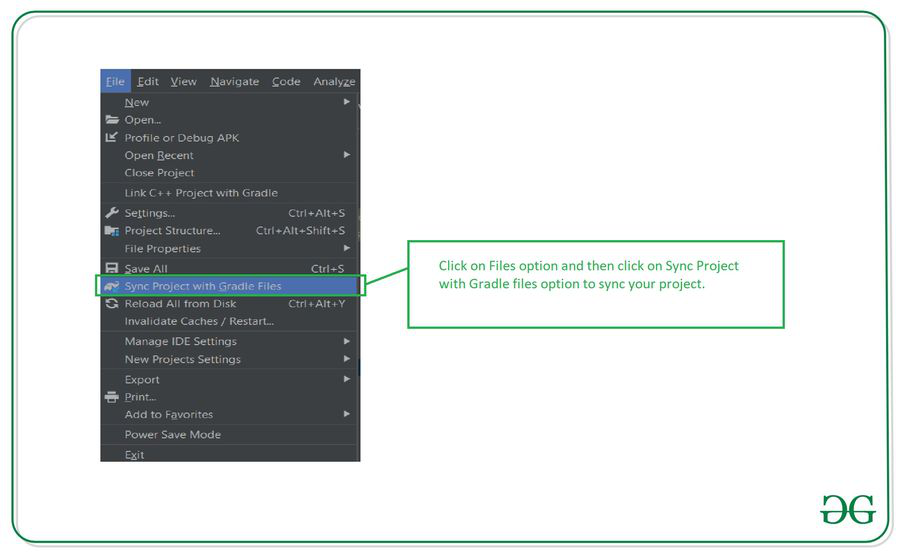
This subject won’t be solved if the folder containing Gradle files is deleted or corrupted. In such a case, you need to obtain new recordsdata for Gradle. For this, you need to join your PC to the web and you need to open your Android studio. After opening your mission click on on the Sync Project with Gradle recordsdata choice. This will mechanically obtain the brand new Gradle recordsdata and can repair the problem which is attributable to the Gradle recordsdata.
Method 3: Deleting and putting in new Gradle recordsdata
In some circumstances when your Gradle recordsdata are deleted or corrupted you will be unable to obtain new Gradle recordsdata in android studio. In this case, we now have to delete the Gradle recordsdata that are current already after which once more sync your mission to obtain our Gradle recordsdata once more. For discovering your .gradle folder you need to navigate to the C drive of your computer after which your PC identify folder. Inside that, you’re going to get to see the .gradle folder. We merely should delete this folder. After deleting this folder we now have to reopen our Android studio after which navigate to the Files choice within the high bar after which click on on Sync Project with Gradle Files to sync your mission it is going to mechanically obtain the brand new Gradle recordsdata that are required to your mission. You can get to see this selection on the under screenshot.
This technique will clear up the Gradle subject and mechanically downloads the brand new Gradle files.