


Last Updated : 08 Oct, 2024
In Android Studio, generally the record of gadgets and emulators doesn’t record your bodily system once you attempt to plug it in. Or you will have confronted a scenario once you plugged the telephone in for the primary time, no dialog appeared asking should you belief the pc. But the laptop computer is already allowed to hook up with the cellular system. However, the button Run doesn’t enable to the deployment of the app to the linked system as a result of it thinks that there is no such thing as a linked system. So you might get confused about what’s mistaken with the system. Before doing something, simply test the next configuration. Configuring Your System to Detect Your Android Device
- Install the USB driver to your Android system.
- Enable USB debugging in your Android system.
- If obligatory, set up the Android growth instruments (JDK/SDK/NDK).
- Add your Android SDK to the RAD Studio SDK Manager.
- Connect your Android system to your growth system utilizing the USB cable supplied together with your system.
Even if in case you have executed every little thing that’s talked about above, should you get this error “Android Studio doesn’t see the system”, then you might be on the suitable web page.
This article is for such programmers. In this text, there are 5 strategies listed beneath to resolve this subject.
If you need to deepen your understanding of Android growth and discover ways to deal with technical challenges like this, contemplate enrolling within the Android Development with Kotlin course from GeeksforGeeks. This course covers key points of Android growth, together with system administration and debugging, that can assist you construct and take a look at apps effectively.
How To Solve “Android Studio doesn’t see the system”
Method 1
To change what your utility defaults to once you click on to run or debug in Android Studio, comply with these steps:
Step 1: Go to the Run (on the left nook) then click on on Edit Configurations.
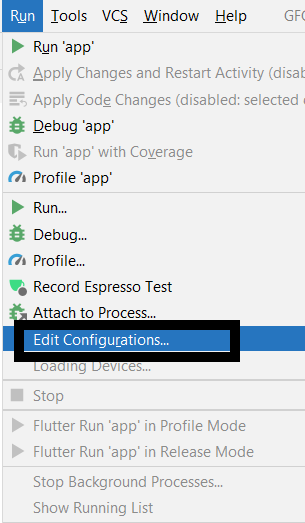
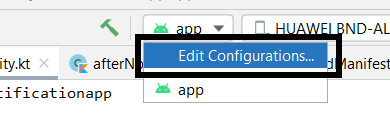
Or you’ll be able to simply click on right here to seek out the “edit configurations” tab:
Step 2: Select the undertaking. Find the Target Device part beneath the General tab on the Android Application web page.
That appears to be the place you toggle what the undertaking builds too. If you’re importing a undertaking it really defaults to Emulator, undecided why. You may choose “Open Select Deployment Target Dialog” to record each linked in addition to emulated gadgets.
Method 2
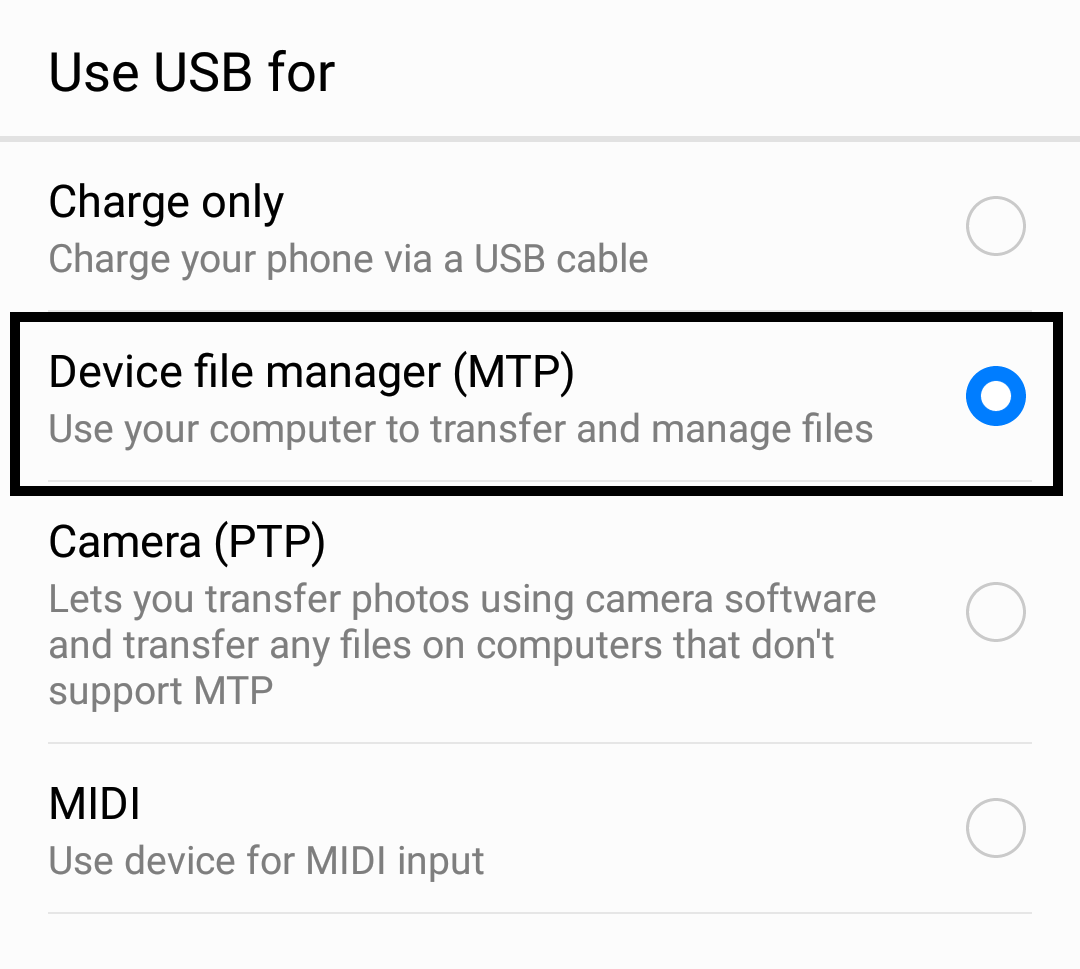
If Android Studio doesn’t even detect your system utilizing ‘ADB gadgets’. then attempt to change to PTP as a substitute of MTP in your system. To achieve this, simply click on on “File switch by way of USB contact for extra choices” within the notification space of the system.
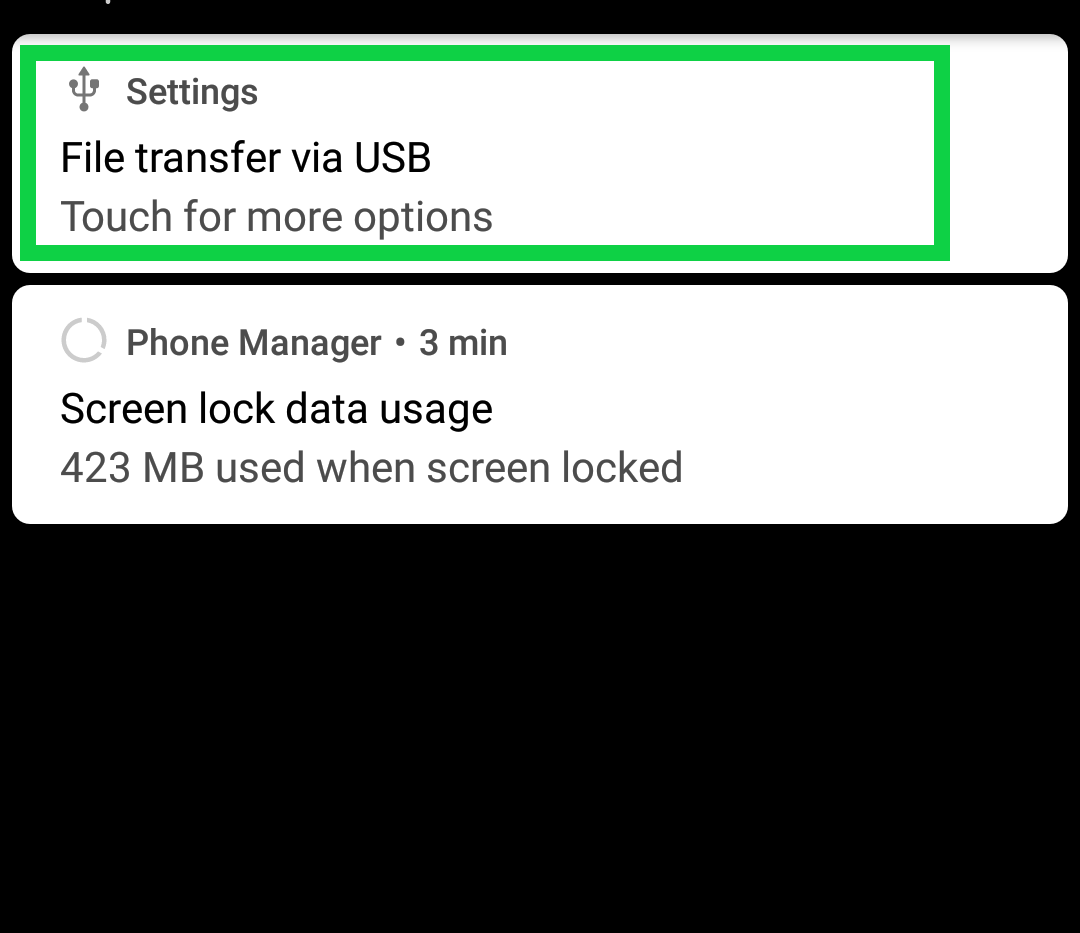
And then select the PTP possibility.
Then you’ll get a popup in your system relating to entry. Just attempt restarting Android Studio to indicate up there as effectively although.
Method 3
On your system:
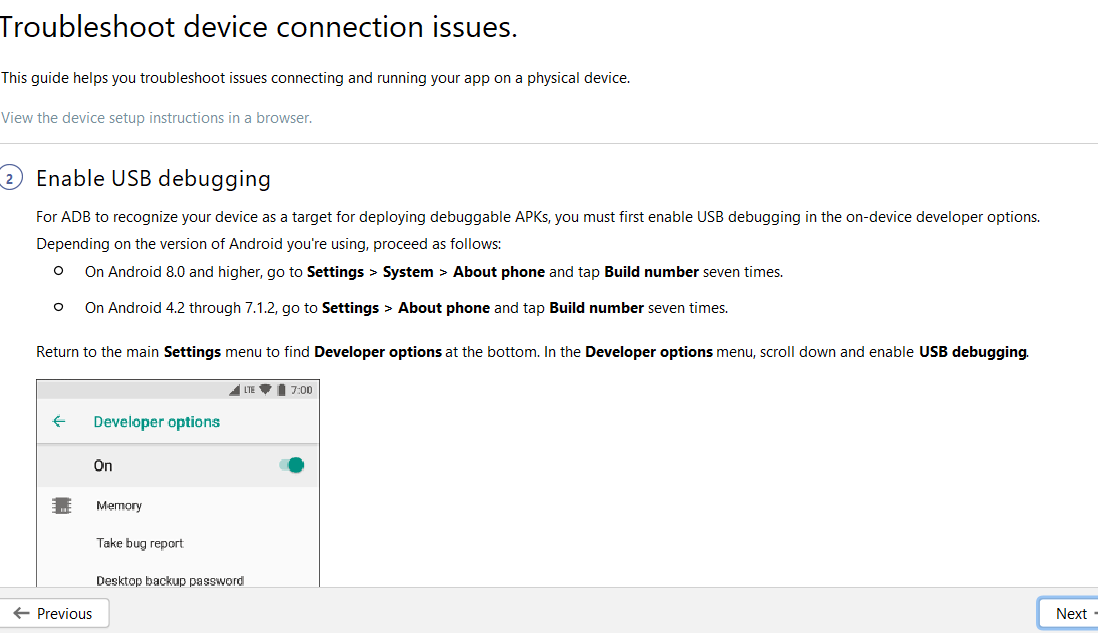
Go to settings/developer settings/enable USB debug mode
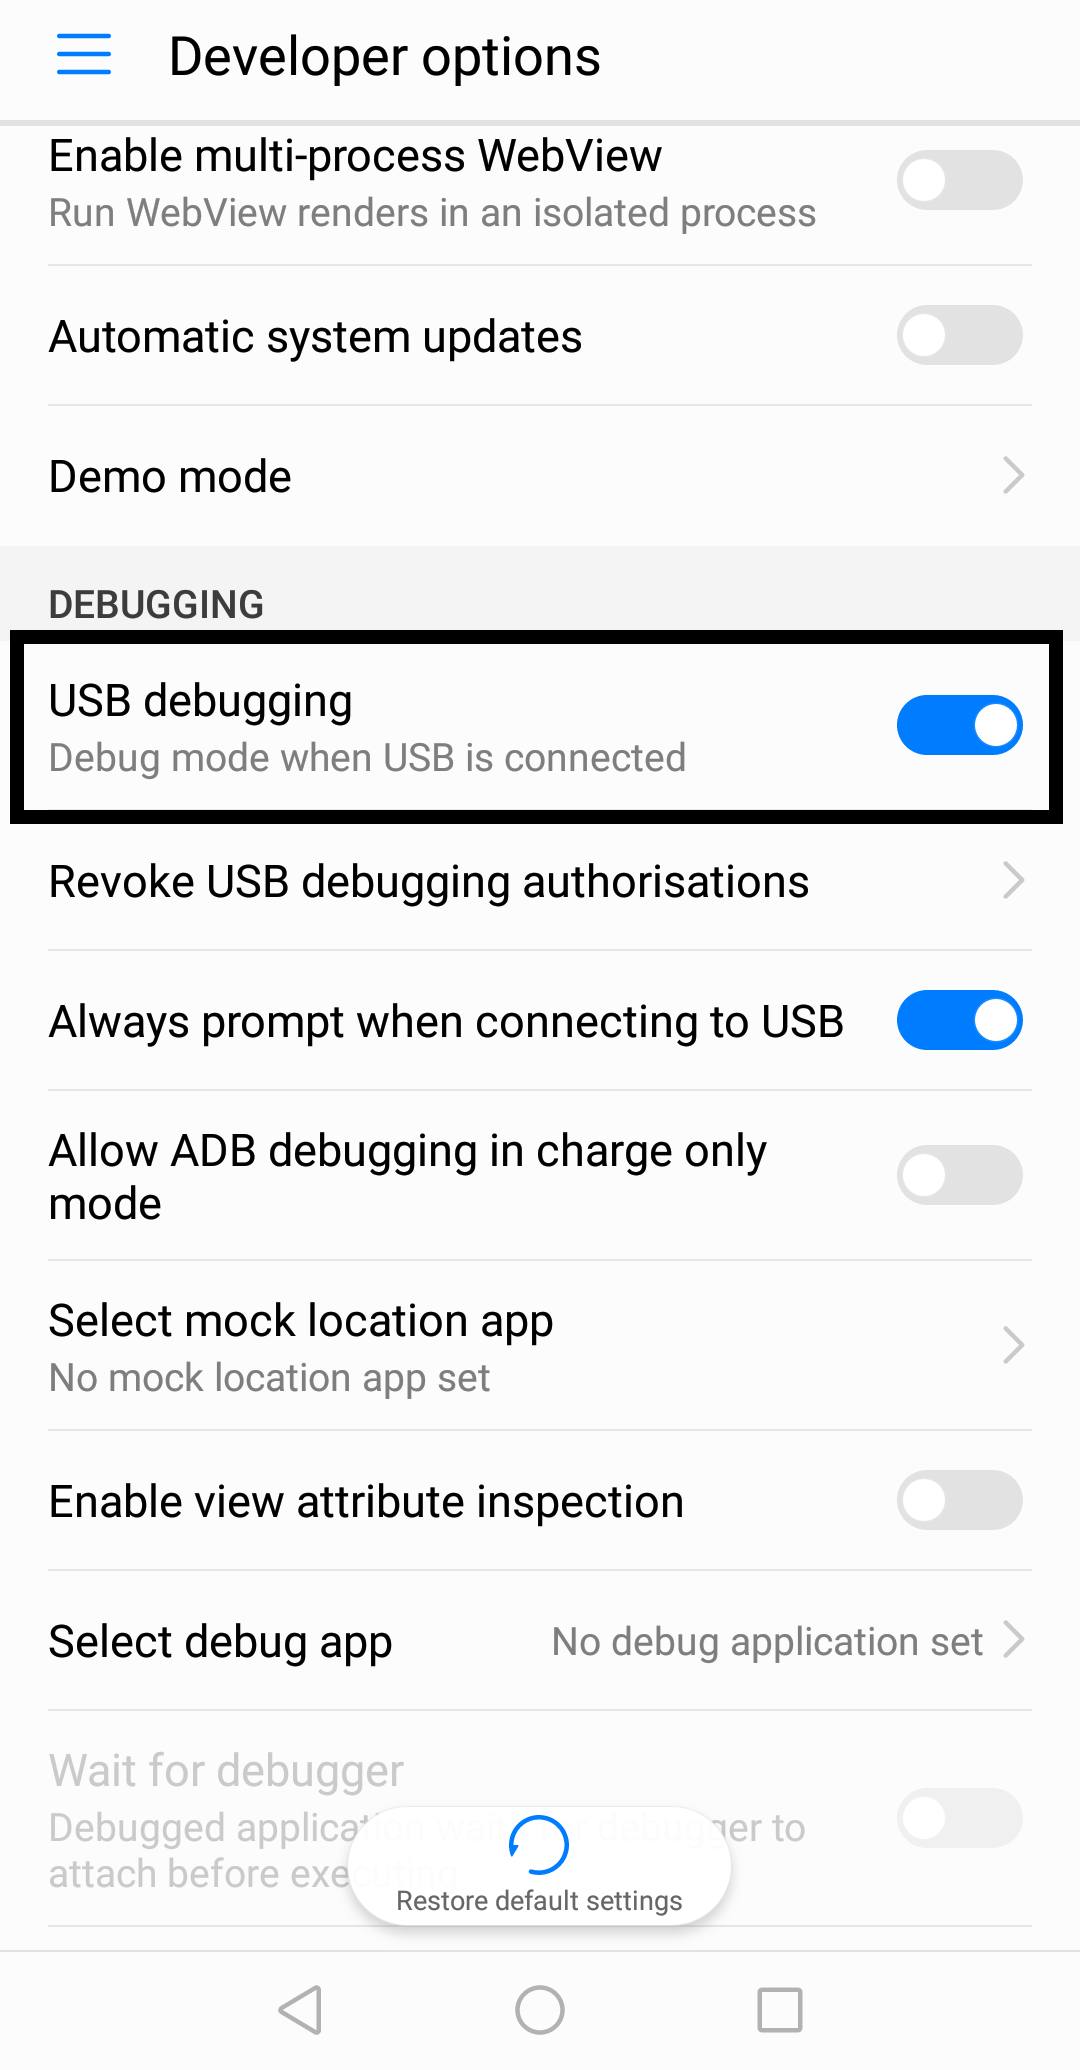
If you might need the system at the moment linked to your PC, then the ‘enable USB debug mode’ possibility is disabled. Just disconnect the system and the choice ought to now be accessible. If you might be utilizing Android 4.2 and newer, the Developer choices are hidden by default. To make it accessible, go to Settings > About telephone and faucet Build quantity seven instances.
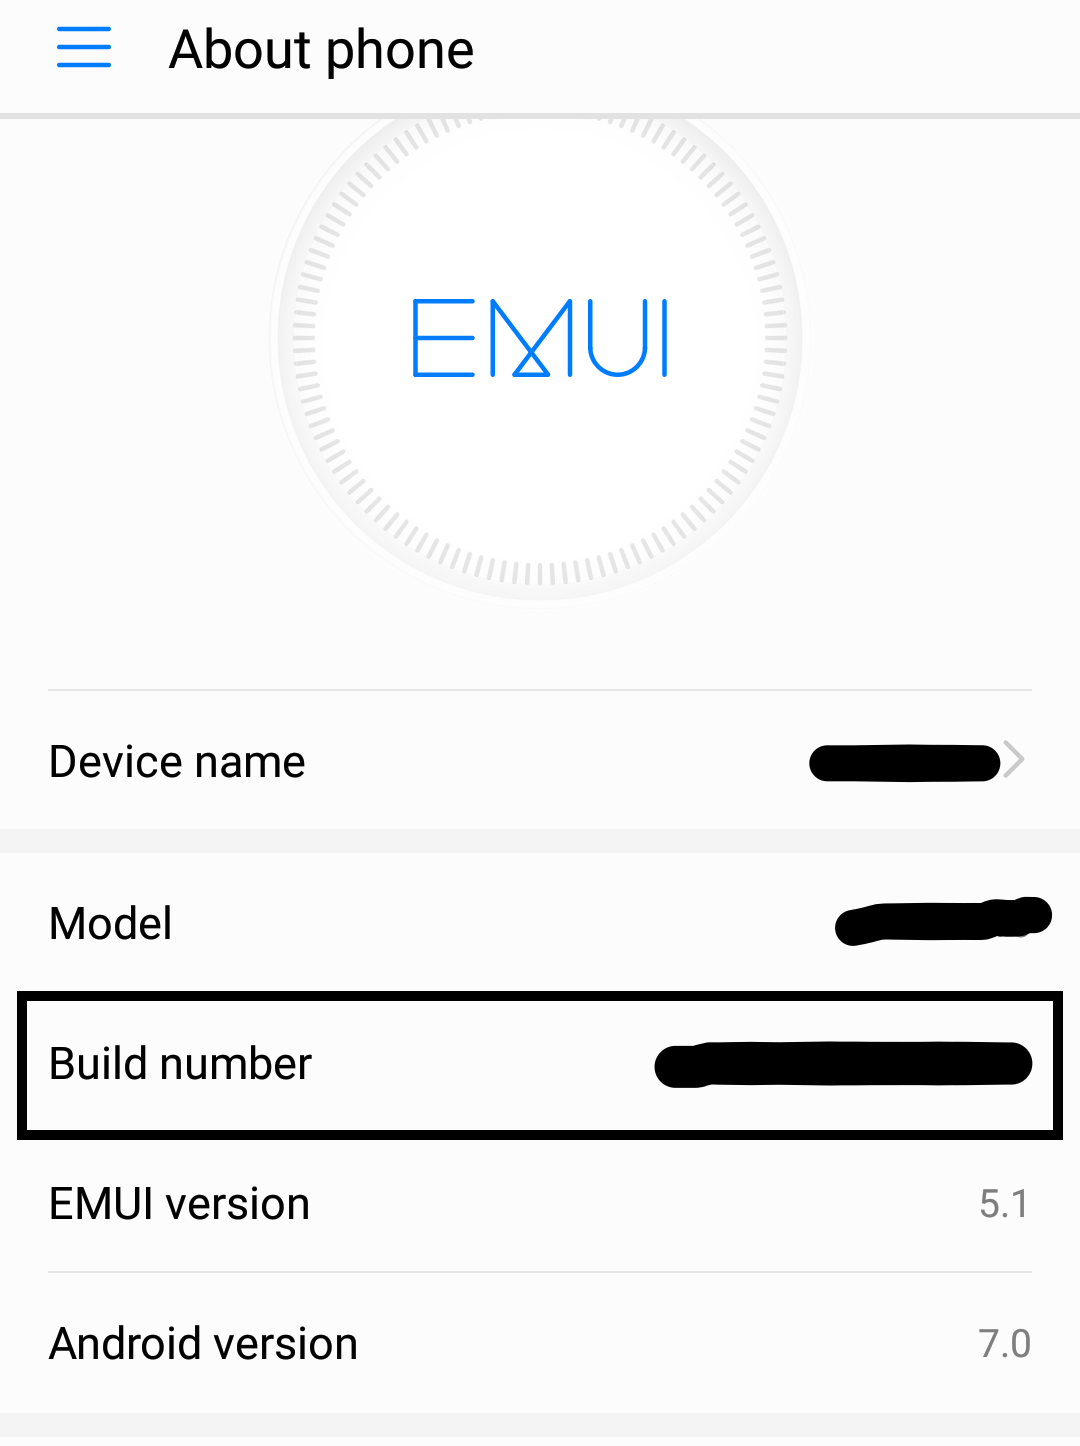
Return to the earlier display to seek out Developer choices.
Method 4
You might must restart ADB, from the terminal. To achieve this simply kind the beneath instructions:
- ADB kill-server
- ADB start-server
or from ddms(If you might be utilizing Android Studio model<3.1) within the gadgets part. Then click on a small arrow down. Restart ADB
Method 5
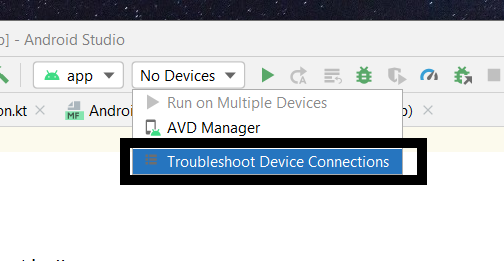
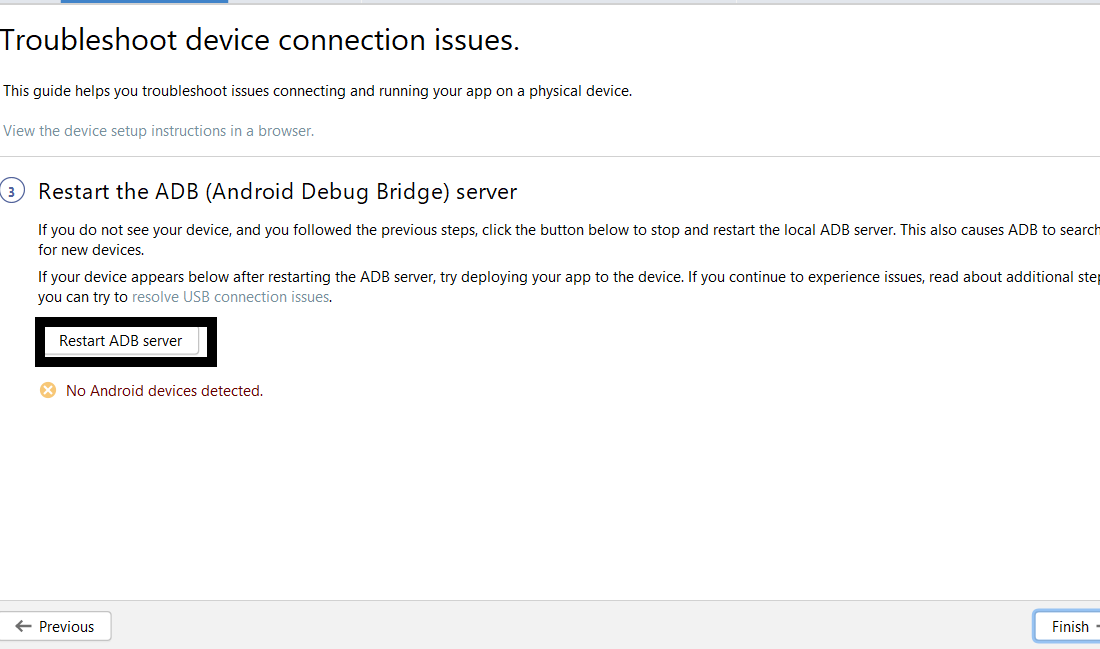
Step 1: Hit the tab the place it’s best to see your system identify however you might be at the moment seeing “no system” and choose “Troubleshoot Device Connections” from the dropdown record.
Step 2: Then it’s best to see this in your display. Click on the “rescan gadgets” button.
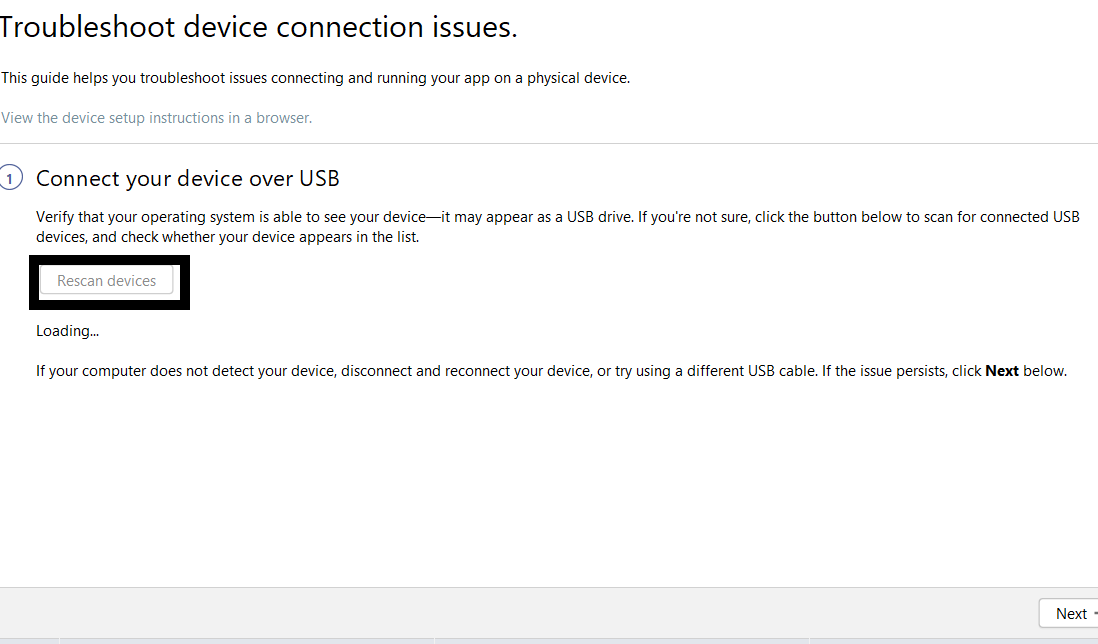
Step 3: If your downside persists even after rescanning, then hit the following button proven in step 2. Then do the settings in your system as prompt.
Step 4: If you can not resolve the issue by following the above steps then click on on restart ADB server.
Step 5: After a number of seconds, you’ll get this message: At least one Android system was detected.
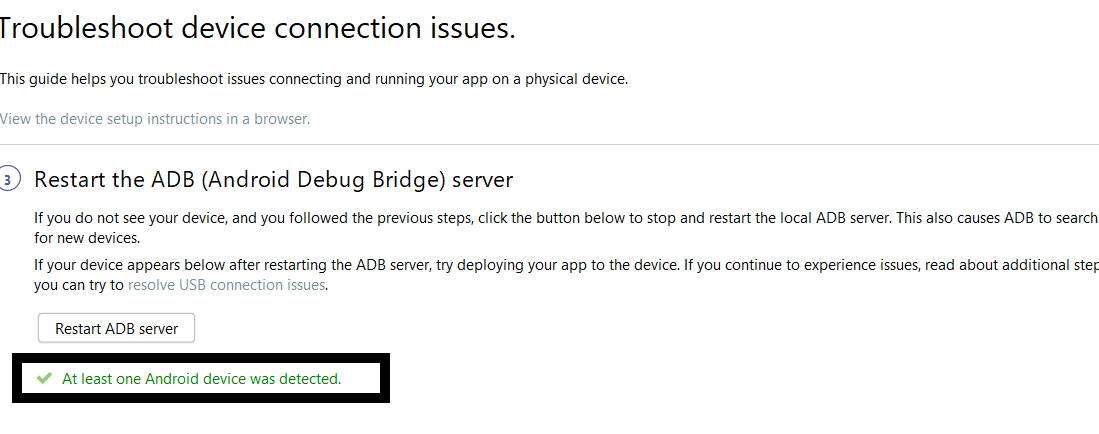
Now should you test, you will note your system’s identify beside the run button.

Improve